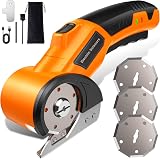
Specialized workshop tools can represent a significant investment, often costing hundreds, if not thousands, of dollars for dedicated single-function machines. For the astute fabricator or hobbyist, however, creative adaptation offers a pathway to expand workshop capabilities without incurring prohibitive costs. The accompanying video aptly demonstrates a few ingenious **DIY drill hacks** that transform a standard portable drill into surprisingly capable alternatives for specific workshop tasks, showcasing the essence of resourceful tool making.
This approach to **homemade tools** not only saves money but also fosters a deeper understanding of tool mechanics and material properties. By repurposing the rotary power of a ubiquitous electric drill, you can create custom solutions tailored to your unique project demands. These drill modifications are not merely temporary fixes; when executed with precision and an understanding of engineering principles, they can become indispensable benchtop allies for a wide array of fabrication and finishing operations.
Transforming Your Drill into a Belt Sander Attachment
A dedicated belt sander is a workshop staple, invaluable for rapid material removal, shaping, and precise edge finishing. However, a benchtop model can be bulky and expensive. The concept of converting a hand drill into a belt sander hinges on utilizing the drill’s rotational energy to drive an abrasive belt over a platen. This ingenious adaptation typically involves constructing a frame or jig that holds the drill securely, along with a series of rollers or bearings to guide the sanding belt. The drill’s chuck then engages an arbor or drive shaft connected to one of these rollers, imparting motion to the abrasive surface.
The Engineering Behind a DIY Belt Sander
Successful execution of this **homemade belt sander** requires careful consideration of several engineering aspects. Foremost among these is stability. The frame must be rigid enough to withstand the forces generated during sanding, preventing vibration and ensuring consistent contact between the workpiece and the belt. Material selection for the frame is crucial; robust plywood, MDF, or even metal profiles can be employed. The drive roller, directly connected to the drill’s output, needs to be concentric and balanced to minimize runout and vibration. Idler rollers, which guide the belt, should ideally be fitted with bearings to reduce friction and improve belt tracking. Tensioning mechanisms, often involving adjustable screws or springs, are also vital to keep the belt taut and prevent slippage during operation.
Applications and Material Considerations for Belt Sander Attachments
A drill-powered belt sander excels at tasks such as deburring metal edges, shaping wooden components, and preparing surfaces for finishing. Its relatively small footprint compared to commercial units makes it ideal for workshops with limited space. When using a drill for this purpose, it’s important to match the drill’s RPM capabilities with the appropriate belt speed for the material being worked. Softer materials like wood and plastic generally tolerate higher speeds, while metals might require slower speeds to prevent excessive heat buildup and abrasive wear. Always ensure the abrasive belts are designed for the intended use and are securely fastened to prevent unforeseen hazards. The longevity and efficacy of such a tool are directly proportional to the quality of its construction and the maintenance of its components.
Crafting a Mini Disc Sander Attachment
For fine detail work, intricate shaping, and precise material removal on smaller pieces, a mini disc sander is an incredibly versatile tool. The video’s depiction of a **mini disc sander** creation from a drill highlights its simplicity and effectiveness. This modification typically involves attaching an abrasive disc to a backing pad, which is then mounted directly into the drill’s chuck. When the drill is secured, usually in a vice or a dedicated stand, it transforms into a stationary disc sanding station, offering excellent control for various benchtop operations.
Precision Grinding with a Homemade Disc Sander
The core principle of this drill modification is leveraging the drill’s powerful rotation to drive an abrasive disc. Precision in a homemade disc sander comes down to minimizing wobble and ensuring the disc runs true. This means selecting a high-quality backing pad with a sturdy arbor that fits snugly into the drill chuck. Balancing is key; any eccentricity in the disc or mounting hardware will result in vibration and inconsistent sanding patterns. Users often add a simple fence or work rest to their setup, providing a stable platform for the workpiece and enabling more accurate angle sanding or shaping. For tasks requiring specific angles, a rudimentary adjustable fence can be fabricated to interface with the disc, enhancing repeatability and accuracy.
Component Selection and Safety for Disc Sander Creations
When assembling a **homemade disc sander**, the choice of abrasive discs is paramount. They come in various grits and materials, optimized for wood, metal, or composites. Using self-adhesive discs on a rigid backing pad is a common and effective method. Consideration should also be given to the drill’s maximum RPM; excessively high speeds can lead to rapid abrasive wear, heat buildup in the workpiece, or even disc disintegration if not rated for such speeds. Safety is an overriding concern. Always wear appropriate eye protection and ensure the drill is securely clamped to a workbench or housed within a custom drill press stand to prevent it from moving during operation. The rotational force of a disc sander, even a mini one, can be considerable, and maintaining control over the workpiece and the tool is essential.
Constructing a Functional Drill Press Stand
The portable electric drill, while versatile, lacks the precision and stability for certain drilling tasks that require absolute perpendicularity or consistent depth. This is where the **homemade drill press stand** becomes an invaluable workshop accessory, converting a handheld tool into a dedicated stationary precision drilling machine. The essence of a drill press stand is to hold the drill rigidly and guide its vertical movement, ensuring the drill bit plunges perfectly perpendicular to the workpiece. The video highlights this modification, which is arguably one of the most impactful drill hacks for any workshop focusing on precision.
Enhancing Drilling Accuracy with a Custom Stand
A well-designed drill press stand eliminates the challenges associated with freehand drilling, such as angled holes, inconsistent depth, and drill bit wander. By securing the drill within a robust frame and incorporating a rack-and-pinion mechanism or a simple lever-action system, the user gains unparalleled control over the drilling process. This allows for precise hole placement, clean entry and exit points, and repeatable depth stops. For fine woodworking or metalworking, where even slight deviations can compromise a project, the accuracy afforded by a custom drill press stand is indispensable. It transforms the drill from a general-purpose tool into a specialized instrument for repetitive or critical drilling operations.
Design Principles for Stability and Versatility in Drill Press Stands
The construction of a **homemade drill press stand** necessitates adherence to specific design principles for optimal performance. Stability is critical; the base must be heavy and broad enough to prevent tipping, especially when drilling into harder materials. The column, which guides the drill’s vertical travel, needs to be perfectly perpendicular to the base and robust enough to withstand lateral forces. The drill mounting mechanism should securely clamp the drill body without impeding its chuck or trigger, allowing for easy engagement and disengagement. Furthermore, incorporating adjustable features, such as a height-adjustable table or a tilting base, significantly enhances the stand’s versatility, enabling angled drilling and accommodating workpieces of varying sizes. Attention to these details ensures that the repurposed drill delivers performance akin to a factory-built drill press, maximizing its utility in any fabrication scenario.
Drilling for Answers: Your Questions on Hacks & Homemade Tools
What are “drill hacks”?
Drill hacks are clever modifications that transform your standard electric drill into different specialized workshop tools. This allows you to expand your workshop capabilities without buying expensive dedicated machines.
Why would someone make homemade tools using a drill?
Making homemade tools from a drill helps save a lot of money compared to buying specialized machines. It also fosters a deeper understanding of tool mechanics and lets you create custom solutions for your projects.
What types of tools can I make from a drill using these hacks?
You can transform your drill into a belt sander for quick material removal, a mini disc sander for fine detail work, and a sturdy drill press stand for precise, straight drilling.
What is a drill press stand used for?
A homemade drill press stand helps you drill perfectly straight holes and at consistent depths, which is difficult to do by hand. It turns your portable drill into a stationary tool for more accurate work.
What is the purpose of a homemade belt or disc sander attachment?
A homemade belt sander is great for quickly removing material, shaping, and finishing edges on various items. A mini disc sander is useful for fine detail work and precise material removal on smaller pieces.